My kids both love to play with the pretend food that they got for Christmas last year. So to go along with their food I decided to make them a pair of oven mitts. I could not find a good pattern online anywhere so I decided to make my own. After a few failed attempts (sorry no pictures of those), I came up with one that works for all ages. I would rate this project as easy, it took me about 3 hours to complete the two mittens. Keep reading if you want to make a pair of your own!
Warning: These oven mitts are for play only. They are NOT oven safe.
Materials Needed:
Free child sized oven mitt pattern
2 fat quarters (one in a print, one in a solid)
4 pieces of quilt batting (each about 8" by 11")
2 pieces of double fold bias tape (each about 11 1/2" inches long)
For the bias tape I chose the same color as the solid fat quarter.
Begin with the solid fat quarter. Fold in half and lay the pattern on top. Pin your pattern down and cut out. Repeat. You need a total of 4 mitts from the solid fabric.
You should be able to get 4 pieces from one fat quarter.
Repeat with the print fat quarter. Fold in half, position and pin your pattern and cut out 4 mitts.
You should now have 4 solid mitt pieces and 4 print mitt pieces.
Lay one of the solid pieces on the table WRONG side up. Take one piece of quilt batting and lay over the top so the solid fabric is completely covered. Lay a print piece over the top RIGHT side up. Adjust so the print and solid pieces match up perfectly. Pin the 3 layers in place.
Repeat with the other solid and print pieces. The picture show 2 pieces ready for sewing, in total you should have 4.
Now comes the slightly time consuming part. Using your sewing machine, quilt the three layers together as follows.
Lay the first piece at a diagonal to the foot. Sew straight across (at a diagonal) until you reach the other side. This line of stitching will be your guide for the rest of the quilting.
Using the foot as a guide for width, sew parallel diagonal lines across the entire piece until it looks like the picture.
Next, turn the piece so your sewing machine foot is perpendicular to your diagonal lines. You are going to repeat the process above, but in the opposite direction to create a grid of little squares over the entire surface of the piece.
Repeat this process until all your pieces are quilted.
Trim the excess quilt batting and any loose threads.
Take 2 pieces and align them with the print sides facing each other. Pin around the edge.
Repeat with the other 2 pieces.
Sew the pieces together with a 1/4" seam allowance.
Serge or zig-zag stitch the edge so they won't fray. I do not have a serger so I use a zig-zag stitch - it is quite sufficient for this project.
Repeat with the other mitt.
Turn both mitts right side out.
If you haven't already, cut 2 pieces of bias tape, each 11 1/2 inches long.
Take one piece of bias tape and unfold each end. Pin the ends, right sides facing and sew with a 1/4" seam allowance.
Repeat with other piece of bias tape.
Turn and refold the bias tape so it forms a ring.
Sandwich the raw edge of the mitten in the center of the bias tape and pin in place. Sew around the edge about an 1/8" in from the open edge of the bias tape.
Repeat with other mitt and voila! Two oven mitts that any child is sure to love.
I can get my hands inside the oven mitts so they should be big enough for any child. My two-year-old has no troubles getting them on either.
Enjoy! I'd love to see your projects - feel free to comment and leave a link to your own project.
Thursday, July 21, 2011
Wednesday, July 20, 2011
In the Kitchen | Chocolate Haystacks (No-Bake Cookies)
It is hot, hot this week so I really do not like to use the oven to bake cookies. This recipe is from my childhood and is great for weeks like these.
Chocolate Haystacks
2 cups white sugar
6 tablespoons cocoa
1/2 cup butter or margarine
1/2 cup milk
1/2 tsp vanilla
2 cups shredded coconut
2 cups quick oats
Combine the sugar, cocoa, butter and milk in a saucepan over medium heat. Bring to a boil stirring frequently. The key to these cookies is to really let this mixture come to a full boil.
Remove from heat and stir in the vanilla, coconut and oats.
Lay waxed paper on your counter or on cookie sheets. Drop cookie mixture by teaspoonful onto waxed paper. Allow to cool. As the cookies cool they will harden. Remove cookies from wax paper and store in an airtight container.
Enjoy!
2 cups white sugar
6 tablespoons cocoa
1/2 cup butter or margarine
1/2 cup milk
1/2 tsp vanilla
2 cups shredded coconut
2 cups quick oats
Combine the sugar, cocoa, butter and milk in a saucepan over medium heat. Bring to a boil stirring frequently. The key to these cookies is to really let this mixture come to a full boil.
Remove from heat and stir in the vanilla, coconut and oats.
Lay waxed paper on your counter or on cookie sheets. Drop cookie mixture by teaspoonful onto waxed paper. Allow to cool. As the cookies cool they will harden. Remove cookies from wax paper and store in an airtight container.
Enjoy!
Tags:
In the Kitchen
Tuesday, July 19, 2011
Cherry Picking
Around here we're in the middle of cherry season. Our family did not make it out to cherry picking last year, but we had to go this year since our frozen cherry stash was completely gone. I love having sour cherries in the freezer for making pies and cherry cheesecake. Yum!
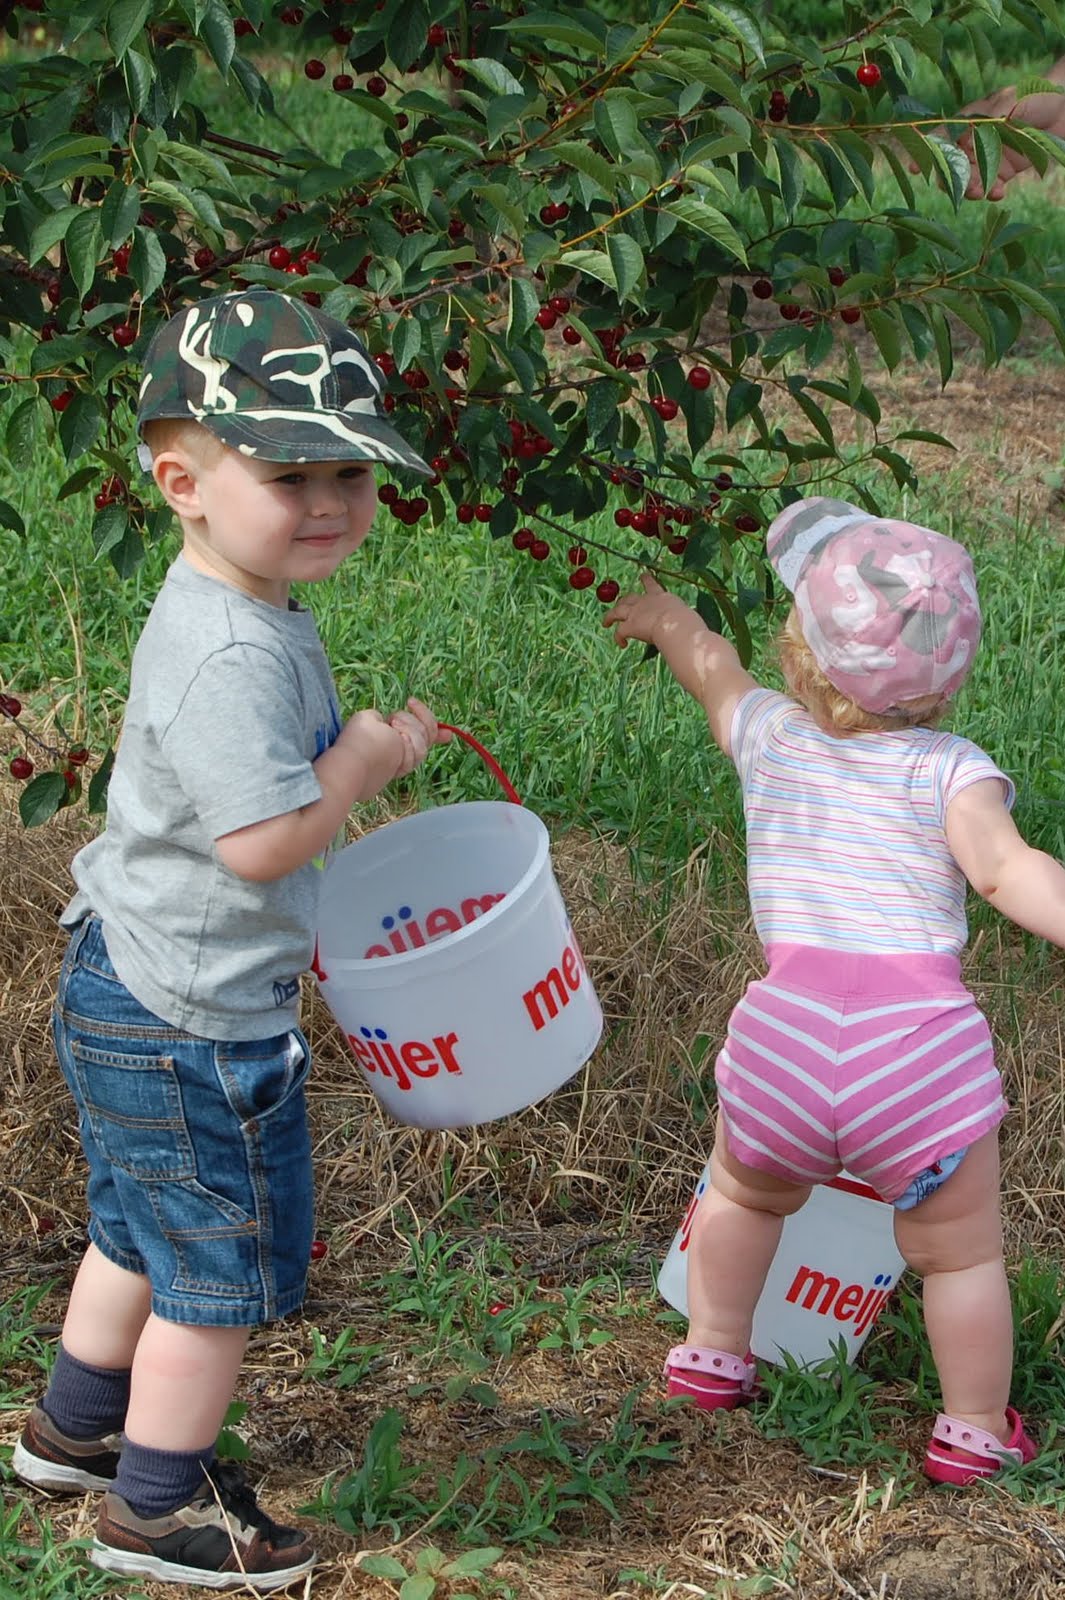
We've never taken the kids cherry picking so it was a new experience for them. They both got the hang of it really quickly. We gave them each a pail and picked a smaller tree so they could reach. Jaden and Hannah both started picking right away.
I was really impressed with how many cherries Jaden picked. Of course, I should mention that we started with picking the sour cherries which are not very good for eating. Jaden tried one and said, "I don't like it."
He proceeded to spit it out, picked another and then asked, "Is this a good one?" I think he thought maybe he picked a bad one. After several similar attempts, I had to tell Jaden to stop eating them. I assured him that we would find some good ones to eat later. The sweet cherries were a whole different story. Jaden was a terrible sweet cherry picker - he was too busy eating them!
By the time we were finished getting our sweet cherries, Jaden was sticky from head to toe. His shirt was a mess and he had cherry juice dripping from his elbows. But they sure were good!
Hannah was quite intrigued with cherry picking also, but wasn't so keen on eating them. Instead she just studied them, put them in her bucket, then one by one dumped them out again. She had fun though.
We've never taken the kids cherry picking so it was a new experience for them. They both got the hang of it really quickly. We gave them each a pail and picked a smaller tree so they could reach. Jaden and Hannah both started picking right away.
I was really impressed with how many cherries Jaden picked. Of course, I should mention that we started with picking the sour cherries which are not very good for eating. Jaden tried one and said, "I don't like it."
|
|
He proceeded to spit it out, picked another and then asked, "Is this a good one?" I think he thought maybe he picked a bad one. After several similar attempts, I had to tell Jaden to stop eating them. I assured him that we would find some good ones to eat later. The sweet cherries were a whole different story. Jaden was a terrible sweet cherry picker - he was too busy eating them!
By the time we were finished getting our sweet cherries, Jaden was sticky from head to toe. His shirt was a mess and he had cherry juice dripping from his elbows. But they sure were good!
Hannah was quite intrigued with cherry picking also, but wasn't so keen on eating them. Instead she just studied them, put them in her bucket, then one by one dumped them out again. She had fun though.
Monday, July 18, 2011
Makeover Monday | Striped Chair
A few years ago I found this chair at a local thrift store. It wasn't much to look at - the faded orange upholstery was less than appealing. But I liked the clean lines of the chair and the $6.00 price tag so I bought it.
I don't have any pictures of the "in-process tearing apart phase", but the foam and inside of the upholstery was nearly as bad as the outside. The foam padding was disintegrating and discolored. For this project I completely redid the upholstery, new padding, webbing and fabric. The fabric I chose was a more modern striped pattern featuring red with a little green.
For the wooden frame I sanded and refinished with tung oil (with lots of help from my ever helpful husband ;). The wood had a nice reddish hue, so no stain was necessary. I am quite happy with the results and the chair now sits in our living room.
Here's another side-by-side view, before and after:
![]() |
The colors in the chair are bolder than I normally like in upholstered furniture, but I see this chair as more of an accent piece. It also brings some nice color into our living room.
Tags:
Makeover Monday
Sunday, July 17, 2011
Menu Plan Monday | July 18, 2011
On Saturday my husband and I took the kids cherry picking so among other things, we have lots and lots of sweet cherries to eat this week. Jaden absolutely loves them though, so that shouldn't be a problem :)
Monday
Sliced Ham
Loaded Mashed Potatoes
Green Beans
Tuesday
Breakfast for Dinner - Ham, sausage, green peppers, onions, potatoes, egg scramble
Sweet Cherries
Wednesday
Spaghetti with Meatballs
Garlic Parmesan Breadsticks
Thursday
Burgers
Meaty Nachos
Green Salad
Friday
Chicken French Bread Pizza
Saturday
Steaks
Grilled Zucchini and Summer Squash
Sunday
Slow-Cooked Tamale Casserole
For more great Menu Plan Monday menu planning ideas visit orgjunkie.com
| The sweet cherry trees were just loaded! |
Sliced Ham
Loaded Mashed Potatoes
Green Beans
Tuesday
Breakfast for Dinner - Ham, sausage, green peppers, onions, potatoes, egg scramble
Sweet Cherries
Wednesday
Spaghetti with Meatballs
Garlic Parmesan Breadsticks
Thursday
Burgers
Meaty Nachos
Green Salad
Friday
Chicken French Bread Pizza
Saturday
Steaks
Grilled Zucchini and Summer Squash
Sunday
Slow-Cooked Tamale Casserole
For more great Menu Plan Monday menu planning ideas visit orgjunkie.com
Tags:
Menu Plan Monday
Friday, July 15, 2011
Friday Fun | Wading Pool
One of the kids' favorite activities during the summer is playing in the water. When Jaden was little I used to fill a bucket of water and put it on the deck for him to play with his bath toys. Now that both Jaden and Hannah are toddlers, we can use the wading pool more.
Hannah absolutely loves the water. She is definitely more bold than Jaden was at her age. Jaden was (and still is) cautious and refused to sit down. Hannah dives right in and enjoys every minute.
Jaden prefers to stand in the pool even now and play with his watering can. He still doesn't like to sit down - it's cold!
On this particular day Asia was wandering around the yard - she had two little people watching through the railing :)
After some swimming the kids needed a snack so I got them pudding popsicles. They sat up on the picnic table to enjoy their treat.
Hannah absolutely loves the water. She is definitely more bold than Jaden was at her age. Jaden was (and still is) cautious and refused to sit down. Hannah dives right in and enjoys every minute.
Jaden prefers to stand in the pool even now and play with his watering can. He still doesn't like to sit down - it's cold!
On this particular day Asia was wandering around the yard - she had two little people watching through the railing :)
After some swimming the kids needed a snack so I got them pudding popsicles. They sat up on the picnic table to enjoy their treat.
Hannah really, really, really enjoyed hers!
Tags:
Friday Fun
Thursday, July 14, 2011
Thrifty Thursday | Pink Dress and Rocking Chair
One of the fun things about having a little girl are all the cute clothes that are available for them. But buying lots of girly dresses can get expensive so I'm always on the lookout when I'm out thrifting. I was so excited to find this pink dress for Hannah on a recent trip to the local thrift store - only $4.00 for a pretty high quality dress! And of course Hannah looks so cute in it.
Hannah already loves her new rocker and is trying to figure out how to get back in and rock some more.
Hannah was totally loving my little photo shoot and was totally cheesing it up for me. She was also really enjoying sitting in the rocking chair that I recently picked up for her. The rocker was a freecycle find (free!) that is destined for a future before/after post. One of the runners is broken off and the other is ready to crack. I also envision painting it white to put in Hannah's room. In the meantime it sits in the master bedroom awaiting its new life.
Hannah already loves her new rocker and is trying to figure out how to get back in and rock some more.
Tags:
Thrifty Thursday
Subscribe to:
Posts (Atom)